How to Repair a Water-Damaged Ceiling After a Leak
How to Repair a Water-Damaged Ceiling After a Leak
Water stains or sagging sections on your ceiling are not only unsightly but can signal a much bigger issue above. Ceiling water damage can result from roof leaks, burst pipes, or even condensation from HVAC systems. Ignoring it can lead to mold growth, structural weakening, and expensive repairs down the line. In this guide, we’ll walk you through how to identify, repair, and prevent ceiling water damage step by step.
Step 1: Identify and Stop the Source of the Leak
Before repairing the ceiling, the most important step is to locate and stop the source of the water. Otherwise, your repairs will be short-lived. Common sources include:
Roof leaks from missing shingles or flashing
Leaking or burst pipes above the ceiling
Overflow from upstairs bathrooms
Condensation buildup from air conditioning units or ductwork
Check for wet insulation or standing water above the damaged area. Turn off your home’s water supply if the source is a plumbing leak. For roof-related issues, inspect your attic during rainfall or use a moisture meter to find wet spots.
Once identified, make the necessary repairs or call a professional to fix the leak before moving forward with restoration.
Step 2: Dry Out the Affected Area
Before you begin patching or repainting, allow the ceiling to dry completely. Use fans, dehumidifiers, and open windows to improve airflow. If possible, remove any insulation that has become wet and replace it after everything is fully dried.
Depending on the extent of the damage, drying may take 24 to 72 hours. It’s essential not to rush this process because moisture trapped inside the ceiling can lead to mold growth.
Step 3: Assess the Damage
Once dry, inspect the ceiling for soft spots or sagging. Press gently on the affected areas using a flat tool or your fingers. If the drywall feels spongy or crumbles easily, it will need to be replaced. Minor water stains, however, can often be repaired without replacing the entire section.
Mark the areas that need to be cut out or patched using a pencil and straight edge. If mold is visible, wear safety gear including gloves, goggles, and an N95 mask before proceeding.
Step 4: Remove the Damaged Material
If the drywall is damaged, use a utility knife or drywall saw to cut out the affected section. Cut at least 2 inches beyond the stained or soft area to ensure you remove all weakened material.
Be cautious of electrical wiring or plumbing hidden behind the ceiling. If you’re uncertain about what’s above, turn off the power to that section of your home before cutting.
Once removed, vacuum up debris and clean the edges of the opening with a damp cloth to remove dust or residue.
Step 5: Treat for Mold and Disinfect
Before installing new drywall, inspect the exposed area for signs of mold. Mold often appears as dark or fuzzy patches on wood or insulation. If found, clean it thoroughly using a mixture of one cup of bleach to one gallon of water or a commercial mold remover. Let the area dry completely.
For added protection, apply a mold-resistant primer or antimicrobial spray to prevent future growth.
Step 6: Patch the Ceiling
Measure and cut a new piece of drywall to fit the opening. Secure it to ceiling joists using drywall screws. Once in place, apply joint tape along the seams and cover it with joint compound using a drywall knife.
Allow the first coat to dry for at least 12 hours, then sand it smooth with fine-grit sandpaper. Apply a second coat, feathering it out slightly beyond the first layer, and repeat the drying and sanding process. Continue until the repaired section blends seamlessly with the surrounding ceiling.
Step 7: Prime and Paint
Before painting, apply a stain-blocking primer to the repaired area. This is especially important if there were water stains, as they can bleed through paint over time. Once dry, paint the ceiling to match the existing color.
For best results, paint the entire ceiling rather than just the patched section to ensure a consistent finish. Use ceiling paint with a matte or flat sheen to conceal imperfections.
Step 8: Replace Insulation (If Applicable)
If insulation was removed during the repair process, replace it with new material once the ceiling is fully dry. Use mold-resistant insulation and ensure it’s properly installed to maintain energy efficiency and prevent condensation.
Step 9: Prevent Future Damage
Once your ceiling is restored, take steps to prevent similar issues from happening again. Regular maintenance can save thousands in potential repairs. Consider these preventive measures:
Inspect your roof twice a year and after major storms.
Clear gutters and downspouts to prevent water backup.
Seal plumbing joints and inspect supply lines regularly.
Insulate pipes and HVAC ducts to reduce condensation.
Install a leak detector in high-risk areas such as attics, bathrooms, and kitchens.
Address small leaks immediately before they cause widespread damage.
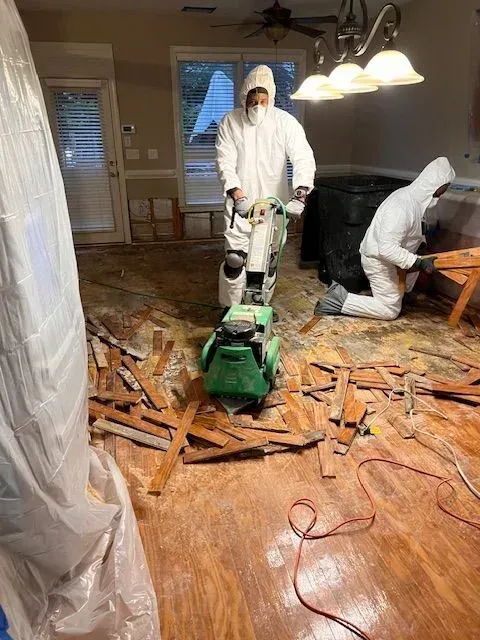
Step 10: When to Call a Professional Restoration Company
While small water stains or minor drywall damage can often be handled by homeowners, significant water damage or mold contamination should be managed by professionals. If your ceiling has sagged, collapsed, or if the insulation and joists have been compromised, it’s best to contact a certified restoration team.
Professionals use industrial-grade drying equipment, moisture meters, and antimicrobial treatments to ensure your ceiling is not only repaired but restored safely and effectively. They can also identify hidden issues like leaks inside walls or ceiling cavities that you may not notice.
Conclusion
Repairing a water-damaged ceiling is a process that requires patience and attention to detail. The key to long-lasting results lies in fully drying the area, removing damaged materials, and addressing the root cause of the leak. With proper restoration and maintenance, you can restore the ceiling’s appearance, prevent mold growth, and maintain the structural integrity of your home. For larger or recurring water damage, reaching out to a trusted restoration company ensures the job is done correctly and your home stays protected.