How to Remove Mold from Your Attic and Prevent It from Coming Back
How to Remove Mold from Your Attic and Prevent It from Coming Back
Mold in the attic is one of the most common and overlooked restoration issues homeowners face. It often develops slowly due to roof leaks, poor ventilation, or trapped humidity and can go unnoticed until a musty smell or visible discoloration appears. Left untreated, attic mold can lead to structural wood decay, poor indoor air quality, and even respiratory issues. This guide walks you through how to safely remove attic mold and prevent it from returning.
Step 1: Identify the Source of the Moisture
Mold can only grow in the presence of moisture. To permanently eliminate attic mold, the first step is to identify what is allowing moisture to build up. Common sources include:
Roof leaks caused by damaged shingles or flashing
Inadequate attic ventilation leading to trapped humidity
Poor insulation causing condensation from temperature differences
Bathroom or dryer vents discharging into the attic instead of outside
Ice dam formation during cold weather
Inspect your attic for water stains on rafters or insulation. If you suspect a roof leak, examine the underside of the roof sheathing for dark streaks or soft areas. Addressing the moisture issue first is critical before tackling mold cleanup.
Step 2: Assess the Extent of the Mold Growth
Next, determine how far the mold has spread. Small areas can often be handled by homeowners, but widespread or toxic mold requires professional remediation.
Signs of mold growth include black, green, or white patches on wood surfaces, insulation, or roof sheathing. Mold may also give off a damp, earthy smell. If the affected area exceeds 10 square feet or if household members experience allergy-like symptoms, call a certified restoration specialist.
Step 3: Gather the Necessary Safety Gear
Mold spores can irritate the lungs, eyes, and skin, so proper protection is essential. Before entering the attic for cleanup, wear:
N95 respirator mask
Goggles without ventilation holes
Rubber gloves
Long sleeves and pants
Seal off the attic entrance with plastic sheeting to prevent mold spores from spreading to other areas of the home. Keep a window or roof vent open for airflow.
Step 4: Remove Contaminated Materials
If mold has grown on porous materials such as insulation or cardboard storage boxes, these items must be removed and discarded. Double-bag contaminated materials in heavy-duty plastic bags and seal them before disposal.
If insulation is wet or moldy, remove it completely. Replacing insulation after remediation helps restore energy efficiency and prevents future moisture retention.
Step 5: Clean Mold from Wood Surfaces
For mold growing on wood beams, rafters, or sheathing, use a cleaner designed for mold remediation. A mixture of water and detergent can remove light mold, while more severe cases may require a commercial antimicrobial cleaner or a diluted hydrogen peroxide solution.
Scrub the affected areas thoroughly using a stiff-bristle brush. Avoid using bleach, as it only kills surface mold and can damage wood fibers. Once scrubbed, wipe the area clean with a damp cloth.
After cleaning, allow the area to dry completely. Use fans, a dehumidifier, or natural ventilation to speed up the drying process.
Step 6: Sand and Seal the Wood (If Necessary)
If the mold has penetrated the wood, lightly sand the surface using fine-grit sandpaper to remove remaining spores. Always wear a respirator while sanding and vacuum the dust with a HEPA-filter vacuum.
Once clean and dry, apply a mold-resistant sealant to exposed wood surfaces. This helps prevent future growth and protects the wood from moisture absorption.
Step 7: Improve Attic Ventilation
Proper airflow is key to preventing mold from returning. Check that your attic has adequate intake and exhaust ventilation. Soffit vents, ridge vents, or gable vents should allow air to circulate evenly.
Avoid blocking vents with insulation or debris. If the attic feels humid or stuffy, consider installing a powered attic fan or humidity-controlled vent system.
Step 8: Insulate and Air Seal the Attic
Poor insulation can cause warm, moist indoor air to rise and condense on cold attic surfaces. To prevent this, ensure your attic is properly insulated and sealed.
Use spray foam or caulk to seal gaps around light fixtures, plumbing stacks, and ductwork. Install vapor barriers where necessary to keep indoor moisture from reaching the attic. Reinstall insulation with the vapor barrier facing downward toward the living space.
Step 9: Check Roof and Gutters Regularly
Roof maintenance plays a major role in mold prevention. Inspect your roof twice a year for missing shingles, damaged flashing, or clogged gutters. Standing water in gutters can lead to leaks that feed mold growth inside your attic.
After heavy rain or snowfall, check the attic for any signs of leaks or moisture. Early detection is the best defense against costly mold remediation.
Step 10: Monitor Humidity Levels
To maintain long-term mold prevention, keep your attic humidity below 50%. A hygrometer can monitor humidity levels easily. If you notice readings above 60%, improve ventilation or install a dehumidifier.
If your home tends to have high humidity year-round, check that exhaust fans from bathrooms and kitchens vent outdoors rather than into the attic space.
When to Call a Professional Restoration Company
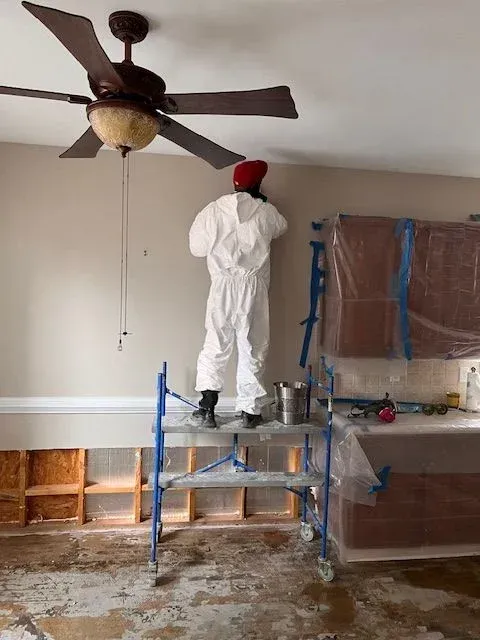
While small mold patches can be handled with DIY cleaning, larger infestations or recurring moisture issues require professional intervention. Mold can grow inside insulation, behind walls, and in roof cavities that homeowners cannot access safely.
A professional restoration company uses specialized equipment such as air scrubbers, HEPA vacuums, and thermal imaging cameras to detect hidden moisture and remove mold completely. They can also apply antimicrobial coatings and ensure your attic is safely restored without spreading spores throughout your home.
Conclusion
Attic mold is a warning sign that something in your home’s moisture management system is failing. Addressing both the mold and its root cause is the only way to ensure a lasting solution. With proper cleaning, sealing, and ventilation, you can restore your attic and protect your home’s air quality and structure for years to come. If you discover significant mold growth or damage beyond your control, professional restoration experts can step in to ensure your attic is safely remediated and fully protected from future problems.
