How to Clean and Restore Your Home After Smoke Damage | Leak Proof Restoration
How to Properly Clean and Restore Your Home After Smoke Damage
Few things are as devastating as a house fire — even a small one. Even after the flames are put out, homeowners are often left facing a less visible but just as harmful problem:smoke damage. Smoke can seep into walls, ceilings, carpets, and furniture, leaving behind a stubborn odor and harmful residue that can linger for months if not treated properly.
AtLeak Proof Restoration, we’ve seen firsthand how smoke can affect every inch of a home. Whether it’s a kitchen fire, furnace puff-back, or minor electrical malfunction, propersmoke cleanup and restorationis essential to protecting your property and health.
This step-by-step guide will walk you throughhow to safely clean, deodorize, and restore your home after smoke damage, and when it’s time to call in professionals to ensure your home returns to a safe, healthy state.
Step 1: Ensure Safety Before Entering the Property
Before you even think about cleaning, make sure your home isstructurally safeto enter.
Check for:
Unstable walls or ceilings:Fire can weaken wooden beams and drywall.
Lingering smoke:Wear amask or respiratorrated for smoke particles (N95 or better).
Power safety:Donotturn on electricity until inspected — damaged wiring can spark new fires.
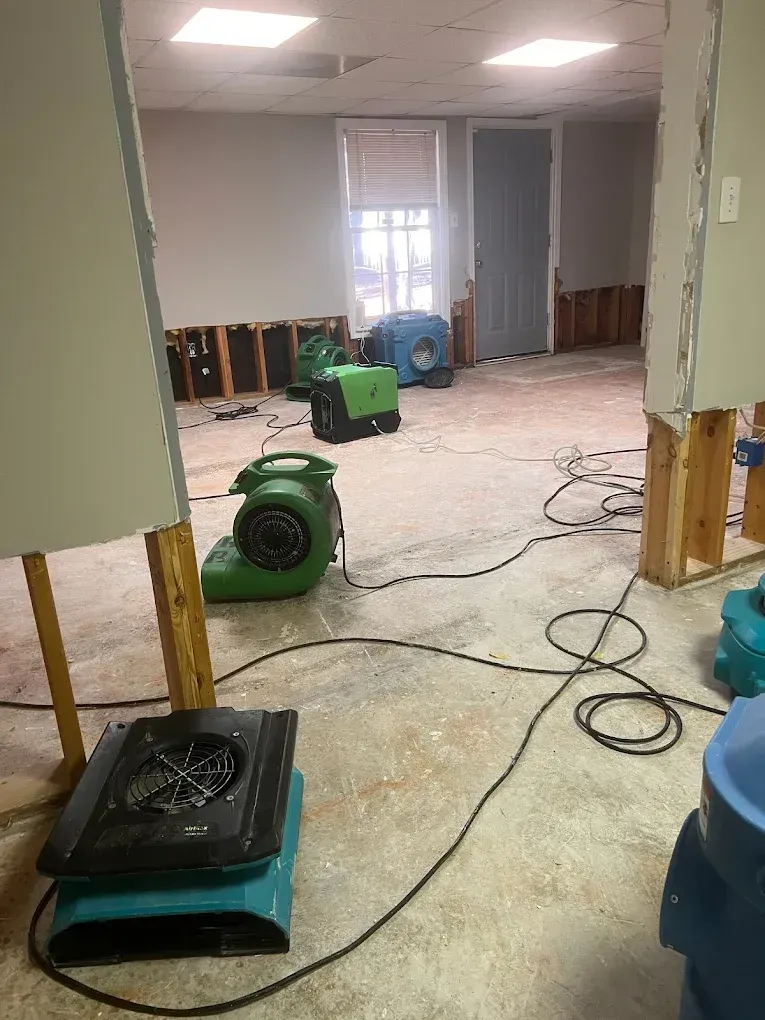
If firefighters used water to extinguish the flames, your home may also be at risk formold growthwithin 24–48 hours. Leak Proof Restoration offers combinedfire and water damage restoration, ensuring no hidden moisture remains after cleanup.
Step 2: Ventilate and Remove Loose Soot
Once the home is safe,ventilate the areato remove airborne contaminants and reduce the smoke odor.
How to Ventilate:
Open all windows and doors.
Use fans to create cross-ventilation.
Replace HVAC filters — smoke residue can circulate through your air system.
Then, removeloose sootusing aHEPA vacuumor dry cleaning sponge. Never use a wet cloth on soot — moisture can make it smear and permanently stain surfaces.
Step 3: Assess the Types of Smoke Damage
Understanding thetype of smoke residuehelps determine which cleaning methods are effective.
Type of SmokeCommon SourceCharacteristicsCleaning DifficultyDry SmokePaper, wood firesFine powdery sootEasier to cleanWet SmokePlastic, rubber, oil firesSticky, thick residueHarder to remove, strong odorProtein ResidueKitchen fires (burnt food)Invisible film, smells terribleExtremely toughFuel/Oil SmokeFurnace puff-backsGreasy residueProfessional cleaning required
Leak Proof Restoration useschemical spongesandspecialized detergentsfor each type of smoke to ensure full removal without spreading residue deeper into materials.
Step 4: Clean Walls, Ceilings, and Surfaces
If you’re tackling mild smoke damage, follow this safe cleaning sequence:
Materials You’ll Need:
Dry cleaning sponges (chemical sponges)
Trisodium phosphate (TSP) or a mild alkaline cleaner
Gloves and protective eyewear
Buckets, warm water, and microfiber cloths
Steps:
Wipe surfacestop to bottomwith dry cleaning sponges. Replace often — once a sponge turns black, it can reapply soot.
Mix TSP (1 tablespoon per gallon of water).
Gently wash walls, ceilings, and trim with a damp cloth.
Rinse with clean water, then dry completely with fans or dehumidifiers.
⚠️Avoid bleach-based cleaners— they can react with soot acids, worsening stains and odors.
Step 5: Remove Odors Deep Within Materials
Smoke odor doesn’t just cling to surfaces — it penetratesporous materialslike wood, carpet, and drywall.
DIY Odor Control:
Sprinklebaking sodaon carpets and upholstery, let sit 24 hours, then vacuum.
Placeactivated charcoal bagsorwhite vinegar bowlsaround rooms.
Launder washable fabrics withvinegar and oxygen-based detergent.
Professional Odor Removal:
For deep odor removal, Leak Proof Restoration uses:
Thermal fogging– A heated deodorizing mist that reaches every crevice.
Ozone treatment– Breaks down odor molecules on a molecular level.
Hydroxyl generators– A safer, continuous treatment for occupied spaces.
These methods neutralize smells rather than masking them, restoring fresh indoor air quality.
Step 6: Clean Carpets and Upholstery Thoroughly
Soft materials absorb smoke like a sponge. Depending on the extent of the damage:
Minor damage:Use a steam cleaner or professional-grade extraction machine.
Heavy damage:Upholstery and carpets may need replacement, especially if they show permanent discoloration or odor.
Leak Proof Restoration offershot water extraction and antimicrobial rinsesto remove both smoke residue and lingering odors, extending the life of your fabrics.
Step 7: Inspect and Clean HVAC Systems
Your HVAC system is one of the first places smoke travels — and one of the most forgotten. If not cleaned properly, it willrecirculate odor and sootthrough your home for months.
How to Address It:
Replace air filters immediately.
Have ducts professionally cleaned and sanitized.
Wipe vent covers and grilles with a mild cleaning solution.
Leak Proof Restoration’s technicians are trained induct cleaning and deodorization, ensuring your air quality meets post-fire safety standards.
Step 8: Restore Wood, Metal, and Hard Surfaces
Soot and smoke can corrode materials likemetal, chrome, and wood finishes.
Wood:
Use a mild detergent and fine-grit steel wool to clean smoke film.
Refinish or reseal if discoloration remains.
Metal:
Clean with vinegar and baking soda paste to neutralize acids.
Apply protective oil afterward.
Tile, Stone, and Concrete:
Scrub with alkaline cleaner, then rinse thoroughly.
Avoid acidic cleaners — they can etch surfaces permanently.
Leak Proof Restoration uses specialized pH-balanced restoration products designed to safely clean a wide range of household materials.
Step 9: Deal With Smoke-Damaged Belongings
If you’ve had a fire in your kitchen, living room, or bedroom, your personal belongings might also show signs of smoke damage.
What Can Be Saved:
Metal tools, jewelry, and glass can usually be cleaned.
Hard plastics can be restored with non-abrasive cleaners.
Books and papers can sometimes be salvaged throughfreeze-drying and ozone treatment.
What Should Be Discarded:
Charred furniture or structural materials.
Contaminated food or medicines.
Porous materials (like cushions or insulation) that absorbed heavy smoke.
Leak Proof Restoration offerscontent cleaning and restoration services, including pack-out and storage for salvageable items during structural cleanup.
Step 10: Prevent Mold and Secondary Damage
After a fire,water damage from firefighting effortscan be just as destructive as smoke. Mold thrives in damp, dark spaces left behind after cleanup.
Prevention Tips:
Rundehumidifiersfor several days post-cleaning.
Usemoisture metersto detect hidden dampness.
Schedule a professionalmold inspectionif you smell mustiness.
Leak Proof Restoration’s technicians are bothIICRC-certifiedand experienced infire and water restoration, allowing them to address both issues simultaneously.
Step 11: Repainting and Sealing Surfaces
Once surfaces are clean and fully dry, repainting seals in any residual odor and restores appearance.
Best Practices:
Use astain-blocking primerdesigned for smoke damage.
Applytwo coats of high-quality latex paintfor durability.
If odors persist, useshellac-based primerto permanently seal the surface.
Professional restoration contractors can match your paint color and finish to ensure a flawless, factory-like appearance.
Step 12: When to Call a Professional Smoke Restoration Company
While light soot damage can be managed with DIY methods, most smoke damage runs much deeper than homeowners realize.
You should contactLeak Proof Restorationif:
The smoke smell lingers after 48 hours.
Walls or ceilings are discolored or feel sticky.
Electrical fixtures, HVAC, or insulation are affected.
You experience respiratory irritation, dizziness, or headaches.
Our team specializes incomprehensive smoke and fire damage restoration, including cleaning, deodorizing, content recovery, and structural repair.
Step 13: Working With Your Insurance Company
Most smoke and fire damage is covered by homeowners insurance under“sudden and accidental”clauses.
To Ensure a Smooth Claim:
Take detailedphotos and videosof damage before cleaning.
Keep aninventory of affected belongings.
Contact your insurer within 24 hours of the event.
ProvideLeak Proof Restoration’s damage reportfor verification.
We work directly with insurance adjusters to make the process as fast and stress-free as possible.
Step 14: Long-Term Smoke Damage Prevention
You can’t always prevent accidents, but you canreduce future riskwith regular home maintenance.
Prevention Checklist:
Install and testsmoke detectorsmonthly.
Clean kitchen hoods and vents regularly.
Keepfire extinguishersin key areas.
Have yourfurnace and chimney inspected annually.
Store flammable materials safely away from heat sources.
Leak Proof Restoration also providespreventive maintenance consultations, helping homeowners identify fire and smoke risks before they lead to costly damage.
Final Thoughts
Smoke damage may not be as visible as flames, but it’s just as dangerous if left untreated. Acting quickly — and understanding the proper cleaning and restoration steps — can save you money, prevent health issues, and bring peace of mind back to your home.
Whether you’ve experienced a small kitchen fire or large-scale smoke contamination,Leak Proof Restorationis here to help you recover safely, completely, and efficiently. Our experts provide24/7 emergency service, thorough inspections, and guaranteed odor removal — because when disaster strikes, every breath of clean air counts.
